
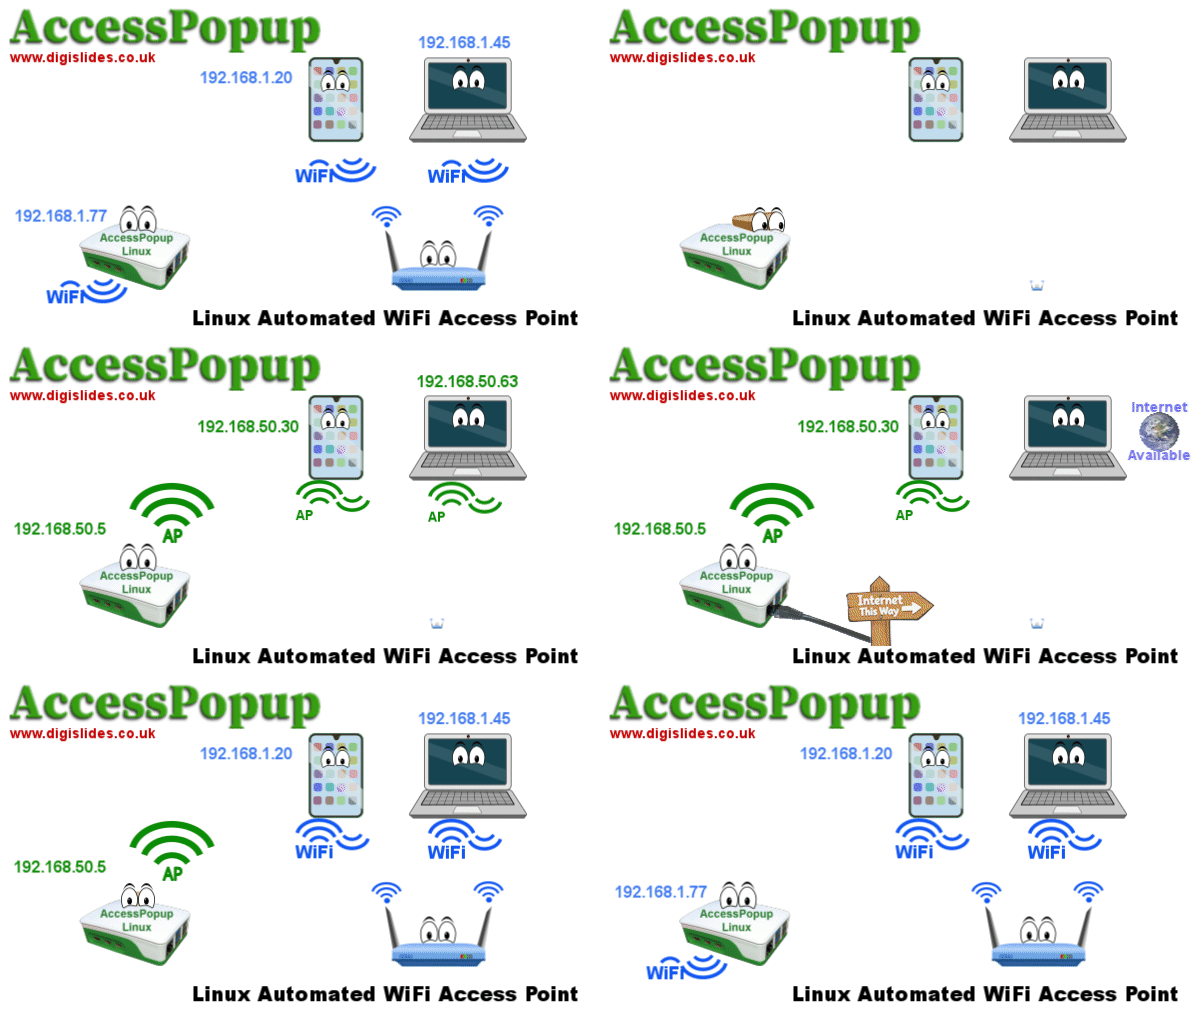
A WiFi Access Point that is automatically created when the WiFi signal is lost but reconnects to the WiFi network when it is back in range, so that a WiFi connection is always available.
For portable devices such as a Raspberry Pi and other Micro Computers, CyberDecks and Linux Laptops that use Network Manager. Useful for both headerless and desktop setups.
Originally developed for the Raspberry Pi, it has been updated to run on most Linux devices that use Network Manager.
With the Raspberry Pi being so portable it is always useful to have a wifi connection. When the wifi signal has been lost due to a weak signal, it can be a bit of a nightmare trying to get access to the Pi without a screen.
The script in this Article will monitor the wifi connection and make sure you are connected to a known Wifi network when the signal is good or it will create a WiFi access point, so you will always have a wifi connection available. It will also allow you to flip to an Access Point with a simple command and back to a WiFi network on demand
The Access Point will allow a direct Wifi connection to the Pi from a Phone, Tablet, Laptop for use with ssh, VNC desktop sharing, a local web server, etc.
Every 2 minutes the AccessPopup script will check the local wifi network signals. If a known one comes back into range, then a connection is made to the wifi network and the Access Point is stopped.
This is useful for Devices that may be running sensors, cameras or other monitoring software in your Garden, Greenhouse, Shed or Garage that may be where the WiFi signal is weak. You will always be able to get a connection over wifi and is ideal for headerless setups.
This is also useful for any setups where the Pi is required to go in and out of wifi range.
Compatibility:
The AccessPopup script should also work on any Debian, Ubuntu, Fedora or Arch Linux device or variants of these distros, (Single Board Computer, Laptop or CyberDeck) that use Network Manager and SystemD. Python is also required for the optional web page controls.
A Raspberry Pi 64 bit computer (Pi5, 500, Pi4, 400, Pi3/+ Zero2) PIOS 12 Bookworm or newer is required as older versions don’t use Network Manager.
The Rpi ZeroW is too slow to work reliably with this on PiOS 13 Trixie so using 12 Bookworm is recommended. The Rpi Zero 2 works fine on PiOS Trixie.
Using a Rpi Zero W 32bit OS, the Access Point connects fine with Windows 11 and Linux but on Android (tested on 15) it does not connect with “password incorrect” this seems to be Androids stricter connection settings.
For older Raspberry Pi OS’s there is a similar script called Autohotspot available on RaspberryConnect.com raspberry-pi-automatic-hotspot-and-static-hotspot-installer which uses dhcpcd instead of Network Manager. Also available on the GitHub repository below.
Installation and Use:
Latest versions:
accesspopup 0.9 22nd March 2026
installconfig.sh 1.01 16th April 2026
Previous_Version of InstallConfig.sh:
If you have a version older than version 1 installed then uninstall AccessPopup before installing version 1 or newer, as there is a different configuration from version 1.
Installation:
AccessPopup is available on GitHub at https://github.com/RaspberryConnect/AccessPopup
Download from GitHub Method 1:
If you have the GIT command installed on your system then usegit clone https://github.com/RaspberryConnect/AccessPopup.git
Download from GitHub Method 2:
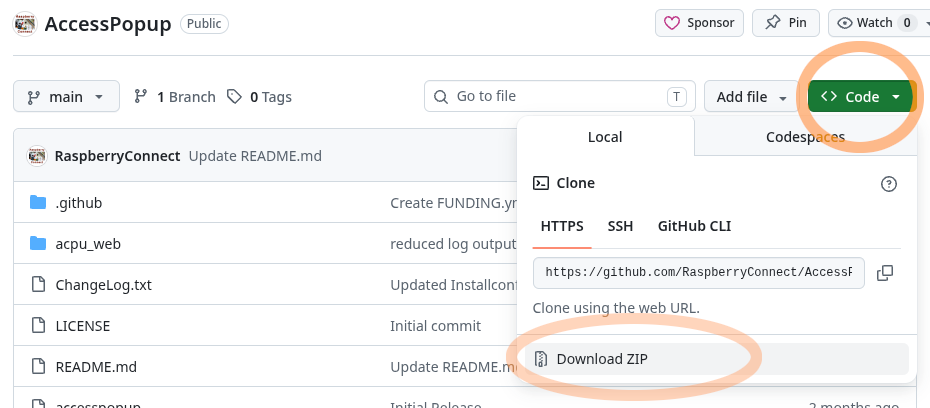
Otherwise while still on GitHub use the “Code” button and choose Download.zip
This will download AccessPopup-main.zip
UnZip the files using the Desktop option or the commandunzip AccessPopup-main.ziprename the folder
mv AccessPopup-main AccessPopup
Install from Downloaded Folder
Next cd to the AccessPopup folder.cd AccessPopup
To run the Installer scriptsudo chmod +x ./installconfig.sh
sudo ./installconfig.sh
Change the password with option 2
The menu options below will be presented. Use option 1 to install the AccessPopup scripts.
This will automatically start monitoring the wifi connection every 2 minutes. It will also check the wifi at startup and then at every 2 minute intervals.
Setting a Constant Access Point:
Sometimes it is useful to be able to use the AccessPoint even though the device is in range of a known WiFi network.
This can be done by opening a terminal window and entering the command:sudo accesspopup -a
to go back to normal use, just run the script without the -a argument.sudo accesspopup
alternately use option 4 “Live Switch…” on this installer script.
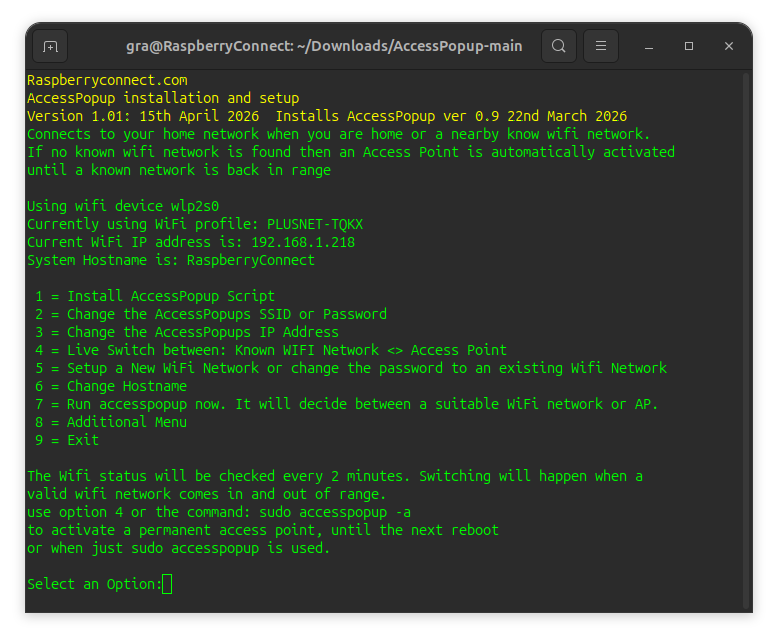
Menu Options
1 = Install AccessPopup Script
Installs the AccessPopup script and starts the 2 minute checks
2 = Change the Access Points SSID or Password
The access points wifi name (ssid) is AccessPopup and the password is 1234567890.
Use this option to change either or both. At least change the terrible password.
3 = Change the Access Points IP Address
The Access Points IP address is 192.168.50.5. Use this option to choose a new IP address, based on 10.0.#.# or 192.168.#.# This is the ip address that is used when using ssh, VNC or a webserver while another device is connected to the Access Point
4 = Live Switch between: Network WiFi <> Access Point
Switch on demand. Set the Pi to an Access Point until the next reboot or switch back to a known WiFi Network in range.
5 = Setup a New WiFi Network or change the password to an existing Wifi Network
Scan for local WiFi networks and connect to a new one or change the password to an existing profile.
6 = Change Hostname
Change the system Hostname, so a connection can be made by name instead of an IP address.
7 = Run AccessPopup now.
The AccessPopup script will decide between a known WiFi network or an AP if one is not in range.
8 = Additional Menu options:
8-1 = Web Interface – enable & disable switch
Installs the Web interface if not previously installed. Then used to enable or disable the web page controls.
Webpage controls are available at http://ip-address:8052 http://hostname:8052 on a wifi network or http://192.168.50.6:8052 for the Access Point.
8-2 = Change the Webport
Change the webport from 8052 to a port of your choice.
8-3 = When Wifi is Disabled: Automatically re-activate Y/N
The AccessPopup script will enable the devices Wifi if it is disabled when it runs every 2 minutes.
If WiFi availability is managed elsewhere on the device then this will disable WiFi activation when AccessPopup is run.
8-4 = Uninstall accesspopup and Web app
Removes the AccessPopup files and the Web Interface if it has been installed.
8-5 = Exit back to previous menu
9 = Exit
Using the Access Point:
“ACPU_Device” = Device Running the AccessPopup Script
“Phone” = WiFi Device connected to the ACPU_Device
For the rest of this guide I will refer to the device running the Linux AccessPopup script as the ACPU_Device so this will be the Raspberry Pi or other Single Board Computer or a Linux Laptop.
The device connecting to the ACPU_Device over Wifi, either directly to the Access Point or via another Wifi Network as a “Phone”. This can be any wifi capable device.
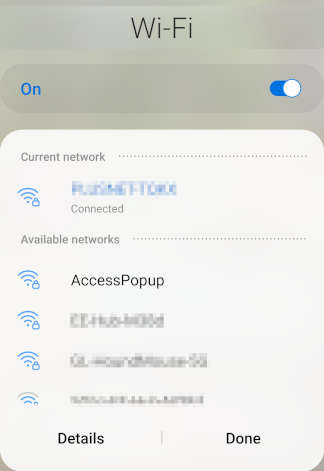
When the Access Point has been activated, the SSID “AccessPopup” will be broadcast. Using a Phone scan for new wifi devices in the area, and select “AccessPopup”. You will be prompted to enter the password.If you have not already changed it, the in-secure default password will be 1234567890.
If you have not already changed it, the password will be 1234567890. Don’t use the password that is used to log into the Raspberry Pi.
The Phone will now be connected to the Access Point.
SSH, VNC, Web Server
Now that a connection to the Access Point has been made, if you are using SSH, VNC or accessing a web server on the Phone then use:
ssh: username@192.168.50.5 so if your user is called “me”, then usessh me@192.168.50.5
VNC remote desktop: enter the server as 192.168.50.5
Web server: if there is a web server running on the ACPU_Device, it can be used by entering http://192.168.50.5/ into a web browser.
The Hostname can be used to replace the ip address only when the ACPU_Device is connected to a WiFi network.
If the ACPU_Device has the Access Point active and an Ethernet connection to the internet is available, then the Phone will also have internet access.
Dependencies
The AccessPopup script requires various packages to be available on the Linux system. They will also be installed if they are not available other than Network Manager and SystemD.
- Network Manager
- SystemD
- IW
- dnsmasq-base (Debian)
- dnsmasq (Fedora, Arch – should be disabled in SystemD).
If you dnsmasq is already on your system or is installed manually then you can check if it is enabled with
sudo systemctl is-enabled dnsmasq.service
If this returns “enabled” then stop it and also stop it from activating at startup with
sudo systemctl stop dnsmasq.service
sudo systemctl disable dnsmasq.service
For the optional Web Interface, Python with a Virtual-Env and PIP will be required. If Python is not already on the system then the Web Interface will not be installed.
Pip and a virtual env will be installed if Python is available but they are not installed.
Configuration File
The InstallConfig menu options allows you to change several features of the AccessPopup script. These settings update the file at /etc/accesspopup.conf.
The configuration is read by the accesspopup script each time it runs. The settings for the access point such as SSID, password, ip address will only change the Network Manager AccessPopup profile when it is first created.
So generally you only need to use the installconfig script to make changes to how the Access Point is setup.
If any option other than “re_enable_wifi=” is changed manually then the AccessPopup Network Manager profile must be deleted before any changes take effect.
To Delete the profile use the command;nmcli con del AccessPopup
The next time the access point is created by AccessPopup, it will have the new configuration.
Changing the Default Wifi Device:
The WiFi device can also be change. By default the ACPU_Devices internal WiFi device is used, such as wlan0. If you wish to use a USB Wifi Dongle on wlan1 with AccessPopup then update the line
#Default Wifi Device
wdev0='wlan0'
to
#Default Wifi Device
wdev0='wlan1'
Delete the existing profile with;
nmcli con del AccessPopup
Wlan1 will be used for the Access Point and any WiFi Network profiles required.
Please Note for Default Wifi device changes; If any WiFi Network Profiles have been setup with the default internal device name e.g. wlan0, it will fail when the AccessPopup script tries to switch to it as it will try to use the old device name.
You will need to setup new connection profiles with the new wifi device, e.g. wlan1, via the installconfig menu option 5 or the Desktop Wifi GUI.