The Web app option can be setup from the installer via option 8 – Additional Menu then option 1 – Web Interface – enable & disable switch
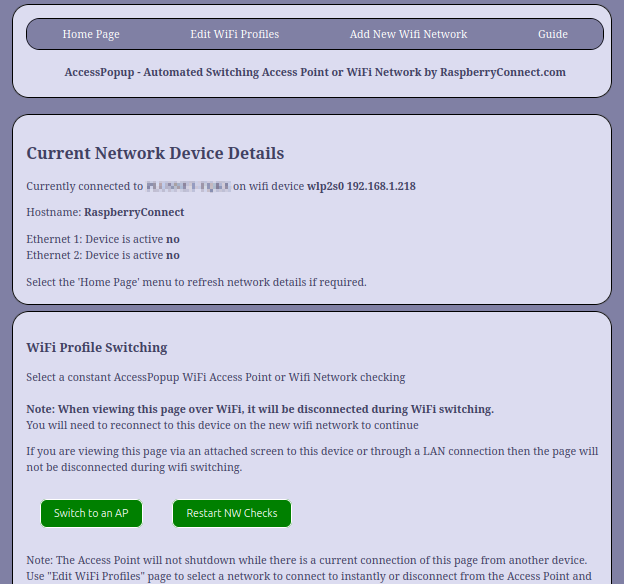
The optional Web page controls allow you to activate the Access point or connect to a new WiFi network when you are out and about or activate the Access Point via a Phone without the need to use SSH or VNC to access your device. So perfect for headerless devices as they don’t have a screen.
Once activated the page will be available at {your devices ip address}:8052
So if my device is connected to the home router called MyRouter and has the ip address of 192.168.1.99 and also my phone is connected to MyRouter i can type http://192.168.1.99:8052 into the phones browser to view the AccessPopup web pages.
In this situation you can usually also use the hostname. So if the devices hostname is MyLinuxDev then you can usually use http://MyLinuxDev:8052 as well.
The hostname is you cmd line prompt after @ and can also be found with the cmd line command; hostname
If the AccessPopup access point is active and my phone is connected the access point as well, then it will use the access points ip address. So i will enter http://192.168.50.5:8052
The hostname will not be available with the access point active.
Enabling the Web Controls
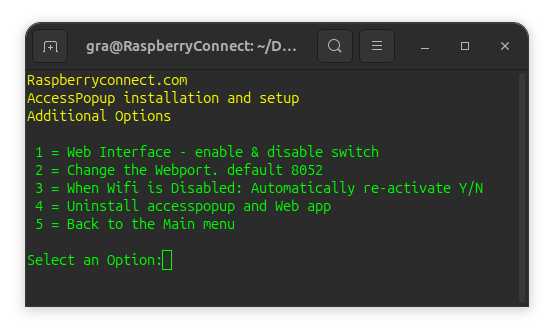
Install, Enable and Disable the web interface with menu option “8 = Additional Menu” and then “8-1 = Web Interface – enable & disable switch”
The first time this option is used the web control files will be installed.
Once the files are installed each use of this option works as a switch by enabling and disabling the web controls.
Guide Reference:
Key:
“ACPU_Device” = Device Running the AccessPopup Script
“Phone” = WiFi Device connected to the ACPU_Device viewing the web pages.
When activated the web interface is available at http://ip_address:8052 or on a WiFi network http://hostname:8052. If the ACPU_Device has a screen then you can also use http://localhost:8052 or http://127.0.0.1:8052 while using the ACPU_Device.
There is a user Guide on the Web Interface for convenient information.
Warning: page disconnections
Because the AccessPopup script and functions on the Web Interface are about switching between Wifi Networks the Web Interface pages will be disconnected from the ACPU_Device with some features. This will obviously result in the buttons and menus not working or time out messages.
So you will need to make sure the ACPU_Device and Phone are on the same WiFi network at all times for it to be used.
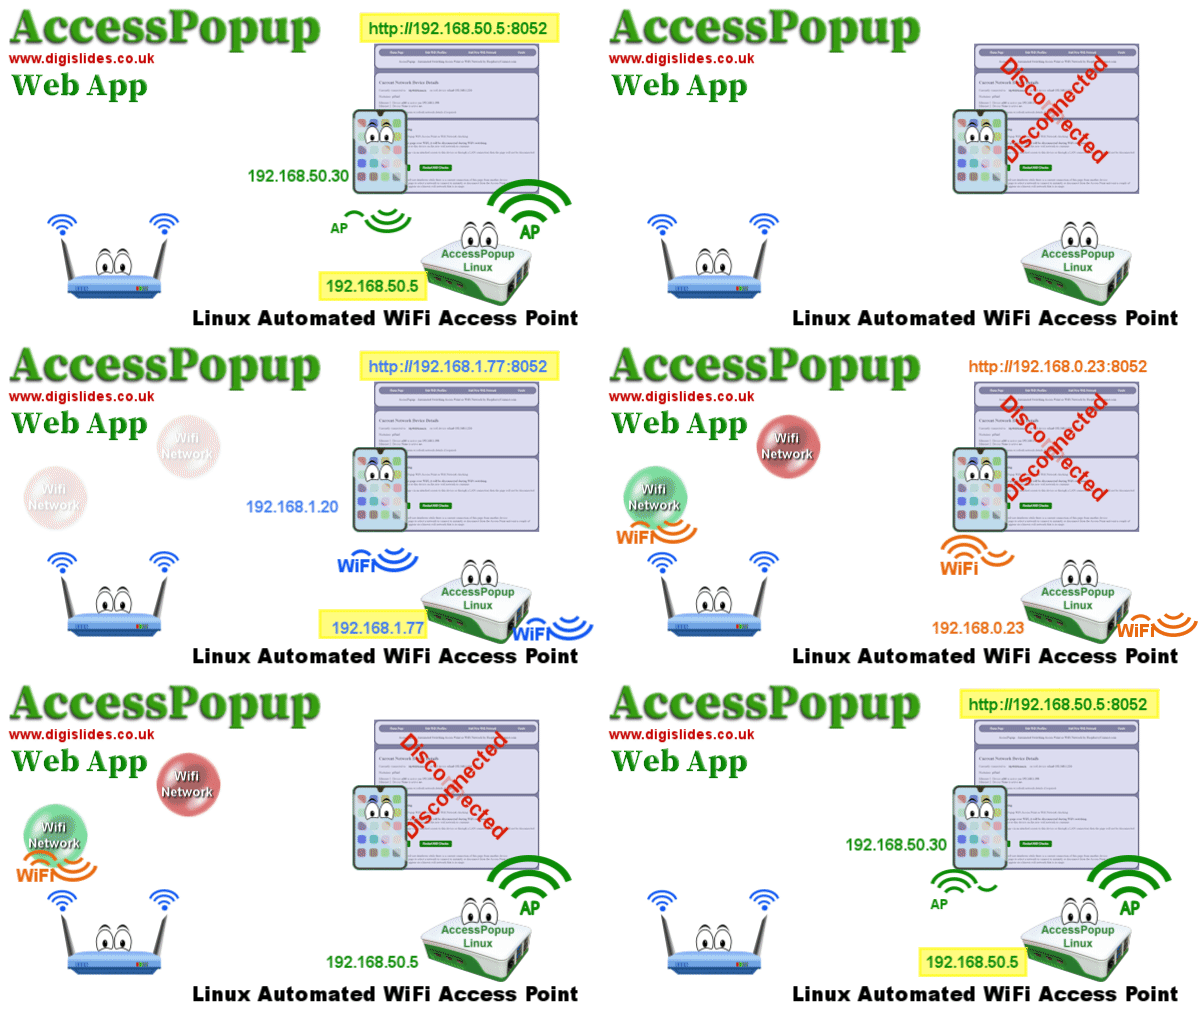

Please Note: If you use the “Switch to AP” button or have used the command “sudo accesspopup -a” the ACPU_Device will be in a permanent access point mode.
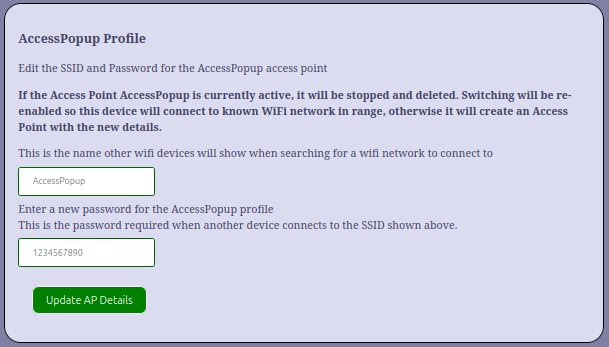
Then if you use the option to change the Access Points password or SSID, the Network Manager profile for “AccessPopup” will be deleted so that the new details can be used. The AccessPopup script will return to the Timer mode and check the connection every 2 minutes.
This is because the Access Point will be shutdown to make the changes and if there is no known WiFi network in range there will be no WiFi access to the ACPU_Device at all. When the 2 minute timer is complete the AccessPopup script will then generate the access point with the new details. So there may be a short delay before some type of WiFi connection is available again.
Please Note Again: because the features of the Web Interface are for modifying the network setup. Even though multiple devices can view the pages at any one time. Only one connection should make changes at a time to avoid causing issues.
Home Page:
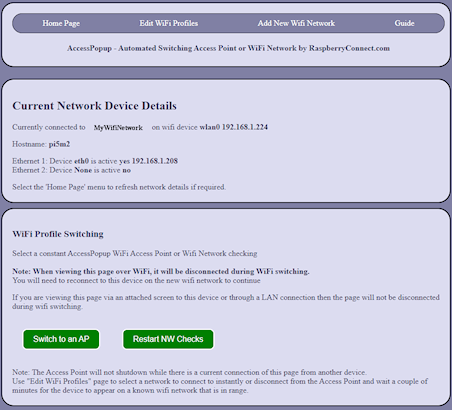
The Home page show details about the network devices.
Wifi network, device and IP address.
If there is an Ethernet cable connected then the IP address will be shown
Refresh this page to get the current connection details when making changes.
The “Switch to AP” will force the ACPU_Device to an Access Point and stop the 2 minute timer.
The “Restart NW Checks” button. Connects to a known Wifi Network in range and restart the 2 minute Timer.
If you need to connect to a specific WiFi network then use the “Edit WiFi Profiles” page.
Edit Wifi Profiles
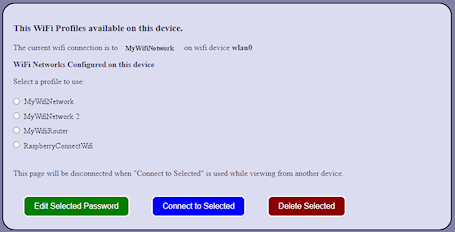
This page lists the known wifi networks setup on the ACPU_Device.
If there are no Networks listed then none are available. Use the page “Add New Wifi Network” to create a new profile.
Select the required network from the list.
“Edit Selected Password” – This will allow you to update the password for a previously save Wifi Network.
It will then be connected to. If there is an issue while connecting, such as an incorrect password, then it will be deleted.
“Connect to Selected” – Connect to the selected network.
If “Switch to AP” on the home page has been used so the Timer is disabled, using this option will re-enable the 2 minute timer.
“Delete selected:” Delete the stored profile.
If the currently connected profile is deleted then an attempt will be made to connect to another nearby network by Network Manager.
Note: If there is no suitable connection available you may have no wifi until the next 2 minute timer is complete. AccessPopup will then create an access point if required.
AccessPopup Profile:
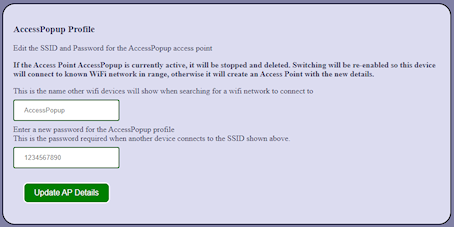
Here you can change the AccessPopups SSID so other Wifi devices see the Wifi Name of your choice. This is also useful when there are multiple devices with AccessPopup running, so you can identify which device has its Access Point active.
The Password can also be change here. If the default insecure password is still available then it’s a good opportunity to change it.
You can change either or both settings. Please Note: If the ACPU_Device is in a permanent Access Point mode with the “Switch to AP” button or the accesspopup -a command, then it will be returned to a switching 2 minute timer.
This is because the profile will be deleted so the ACPU_Device will be left with no wifi connection, if there is no Wifi network is in range.”
Add New Wifi Network
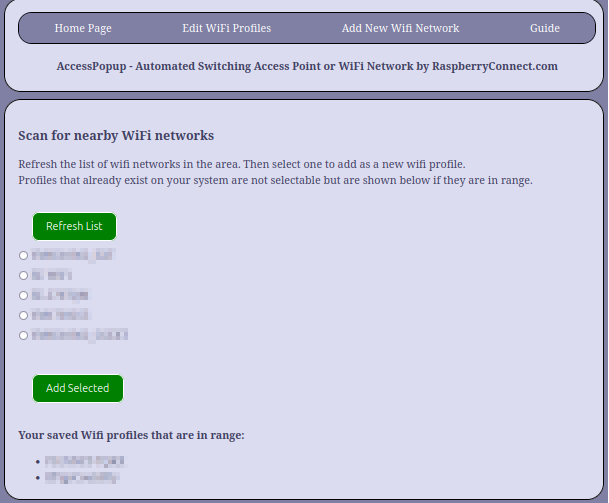
Select the Refresh List button to see a list of nearby wifi networks you can choose to create a new connection for. Please allow the scan to complete before clicking elsewhere.
This can take 30 seconds or so for the list to appear.
If any of the Wifi networks that are configured on the ACPU_Device are in range then they will be shown underneath the list. These can be connected to on the “Edit Wifi Profiles” page.
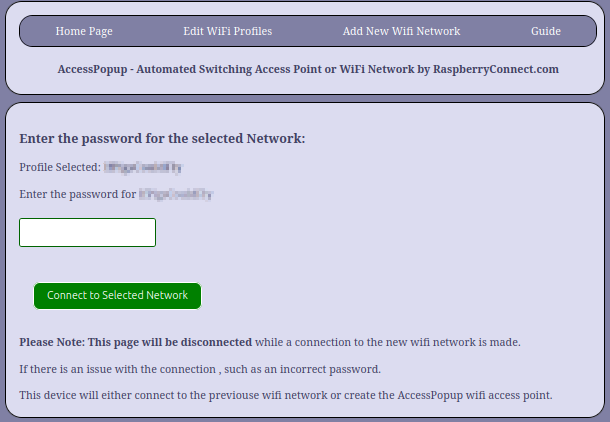
When you have selected a new network from the list and clicked “Add Selected”, you will be asked to enter the password.
When “Connect to Selected Network” is clicked, an attempt will be made to connect to the new network.
If the Connection is successful, the page will timeout as the Phone will now need to connect to the same selected network to reconnect to the ACPU_Device to continue to use the Web App.
If the connection is not successful, such as the incorrect password, then the new profile will be deleted. The ACPU_Deice will either connect to another known Wifi Network or if none are available the Access Point will be started. So you will need to locate what the ACPU_Device has done to continue.
Please Note: some laptop wifi devices are not able to scan for nearby networks if they have an Access Point active.
If this is the case then you will be asked to manually enter the new networks SSID and Password instead of selecting the SSID from the list.
The Access Point will then be stopped and the ACPU_Device will attempt to connect to the entered WiFi network. Any issues such as an incorrect password will cause the profile to be deleted and the ACPU_Device will connected to a known Wifi network or generates the Access Point.
Devices warning of No Internet
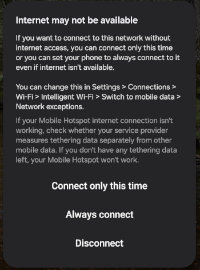
When a Phone, Laptop, Tablet first connects to the AccessPopup access point it may warn you that there is no Internet connection and ask if you want to continue with the connection or just for this session.
The access point won’t have internet access unless the ACPU_Device has an Ethernet cable connected, which is also connected to the internet. So choose “Always Connect”.